How to set up and run a Globalping probe on Windows
We're happy that you're thinking about running a probe and contributing to the Globalping platform!
This guide will show you how to set up and run a Globalping probe on your Windows 10 or 11 computer. We aim to make it beginner-friendly so that you can follow along even if you've never opened a Windows terminal.
Why run a Globalping probe?
Globalping is a platform that enables anyone to run networking commands such as ping, traceroute, dig, and mtr on probes hosted by the community around the world.
So, the platform really thrives on the contribution of the community! With your support, we can continuously improve the platform and provide reliable measurement results to all users for free.
Before you run a Globalping probe, you probably want to know what it does. Here's a brief overview:
Let's say you work in Berlin, Germany, and host a probe in your office.
When a user requests to run a measurement on ten probes in Berlin, the API selects the probes from all online probes in that location to run the command. When the API chooses your probe, it'll establish communication with it to initiate the test and grab the measurement results to deliver them back to the user.
Whether or not the API chooses your probe depends on various factors, such as the provided location data, the current load (the API distributes the load evenly among available probes), and some randomness.
Set up and run a Globalping probe on Windows
In the following, we'll install Docker Desktop and run a Globalping probe with it. Let's get started!
1) Visit GitHub and learn more about Globalping
First, take some time to familiarize yourself with Globalping and the probes if you haven't already. You can find everything you need to know in the respective GitHub repositories:
In the probe repository, you may find it helpful to read about the limitations on where and how to run a probe, as well as the security section, which addresses some frequently asked questions about probe and platform security.
2) Get and install Docker
Docker is a useful tool that makes developing, shipping, and running applications easier. It does this by packaging the application and everything it needs into a portable container that you can run across different environments without issues. That's why we offer our probes for Docker, making it effortless to set up and run the probe on any system.
To get started, we want to set up Docker Desktop:
Install WSL 2
To run Docker on Windows, you need a WSL 2 backend.
WSL (Windows Subsystem for Linux) is a compatibility layer that lets you run Linux distributions on Windows. This means you can use Linux tools and utilities without leaving the Windows environment!
Microsoft recommends installing WSL using PowerShell, so let's do that:
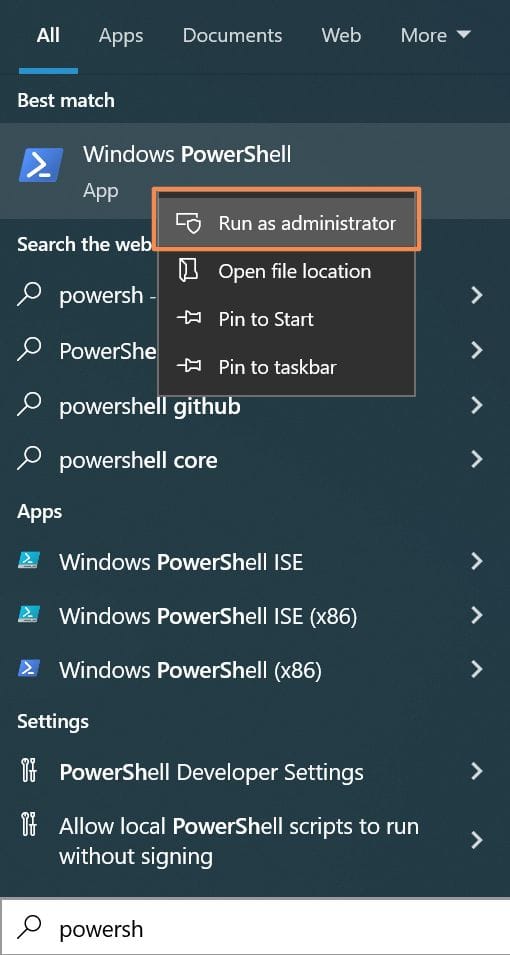
- Open the search bar by pressing Windows + S and type "powershell".
- Right-click on the PowerShell app in the search results and select "Run as administrator".
- In PowerShell, type the following command and press enter:
wsl --install - Wait for the installation to complete (this can take a couple of minutes), then close PowerShell and restart your computer
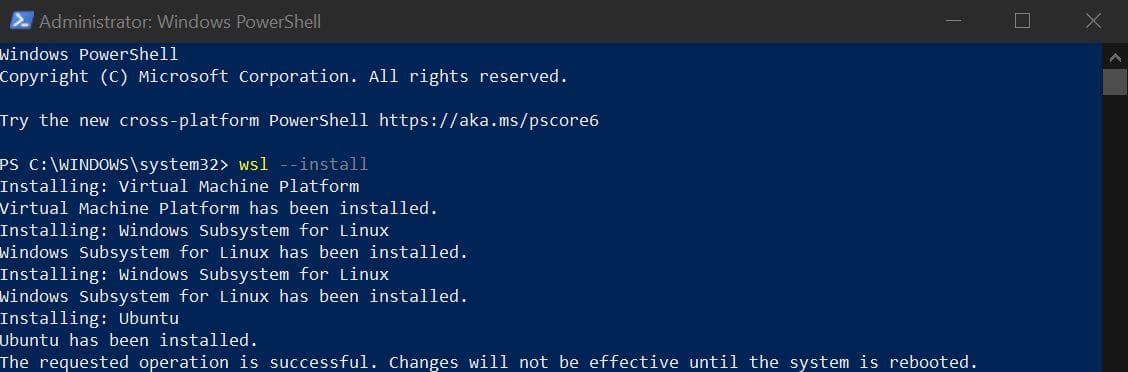
Note: Executing the wsl --install command installs the Ubuntu distribution of Linux and configures your system to run WSL 2, which is required to run Docker.
After restarting your computer, you see a terminal window opening automatically. Ubuntu starts configuring itself, so please wait for the process to complete.
Important: If you see an error message that says something like "enable the Virtual Machine Platform Windows feature," it means you need to make additional configurations. This could happen if your Windows build is too old for wsl --install to run everything on its own. Refer to this Microsoft documentation to learn about manual configuration.
Assuming everything goes smoothly, the terminal prompts you to create your user credentials. Go ahead and define a username and password.

Congratulations, you now have access to your Ubuntu terminal!
Don't close the terminal just yet; we'll need it again later.
Install Docker Desktop
Now, let's get Docker Desktop!
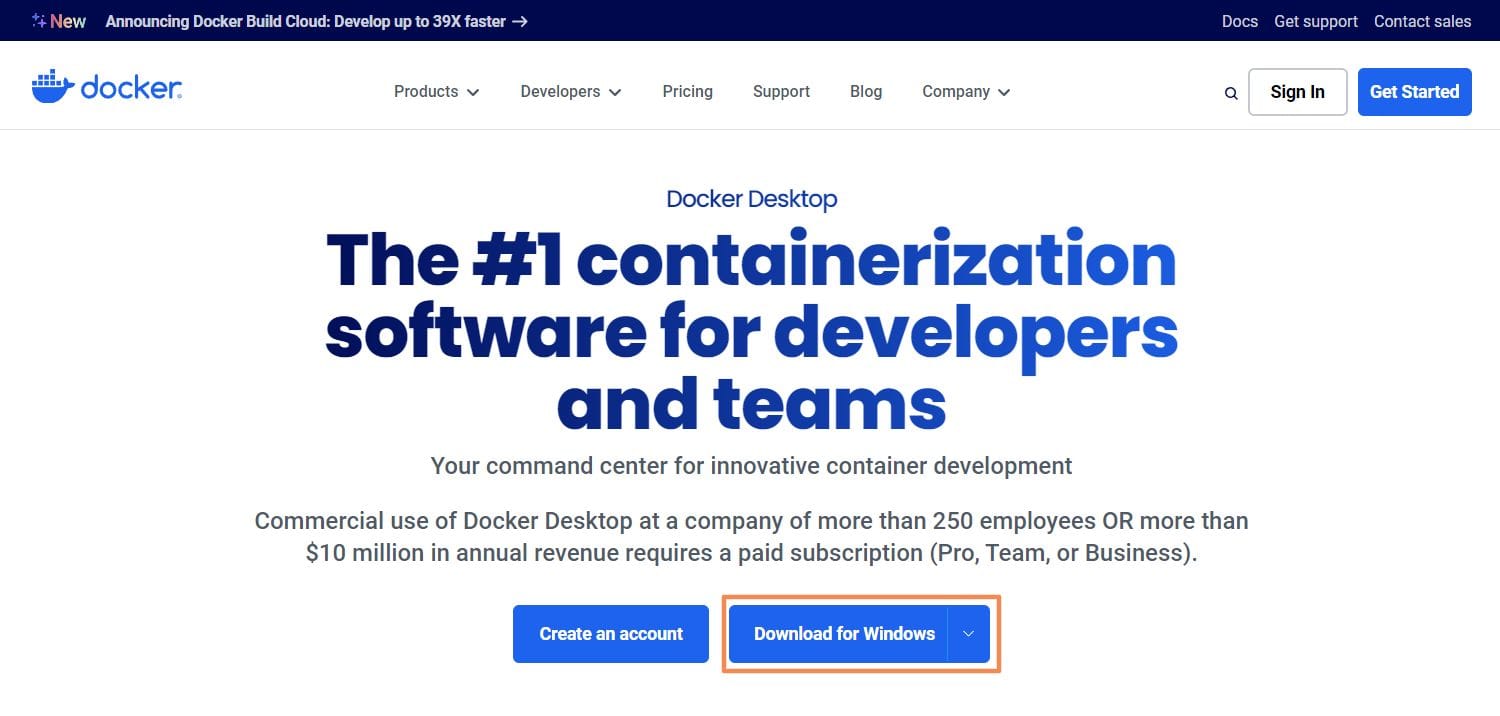
- Go to the Docker website and download Docker Desktop for Windows.
- Once the download is complete, navigate to your Downloads folder and double-click on the `Docker Desktop Installer.exe` file to run the installer.
- On the Configuration page, make sure to select "WSL 2".
- Continue following the installer prompts until the installation is complete.
- After the installation is complete, close the installer.
3) Set up and run a Globalping probe with Docker Desktop
Pull the probe image from GitHub
When you open Docker Desktop, it looks pretty empty. However, we will change that by pulling the Globalping probe image via your Ubuntu terminal.
To download the Globalping probe image, you need to use the docker pull command along with the registry URL. Follow the steps below:
- Copy the following
docker pullcommand to get the latest probe version from GitHub:docker pull ghcr.io/jsdelivr/globalping-probe:latest - Head back to your Ubuntu terminal, paste, and execute the command.
- Wait for the download to complete.
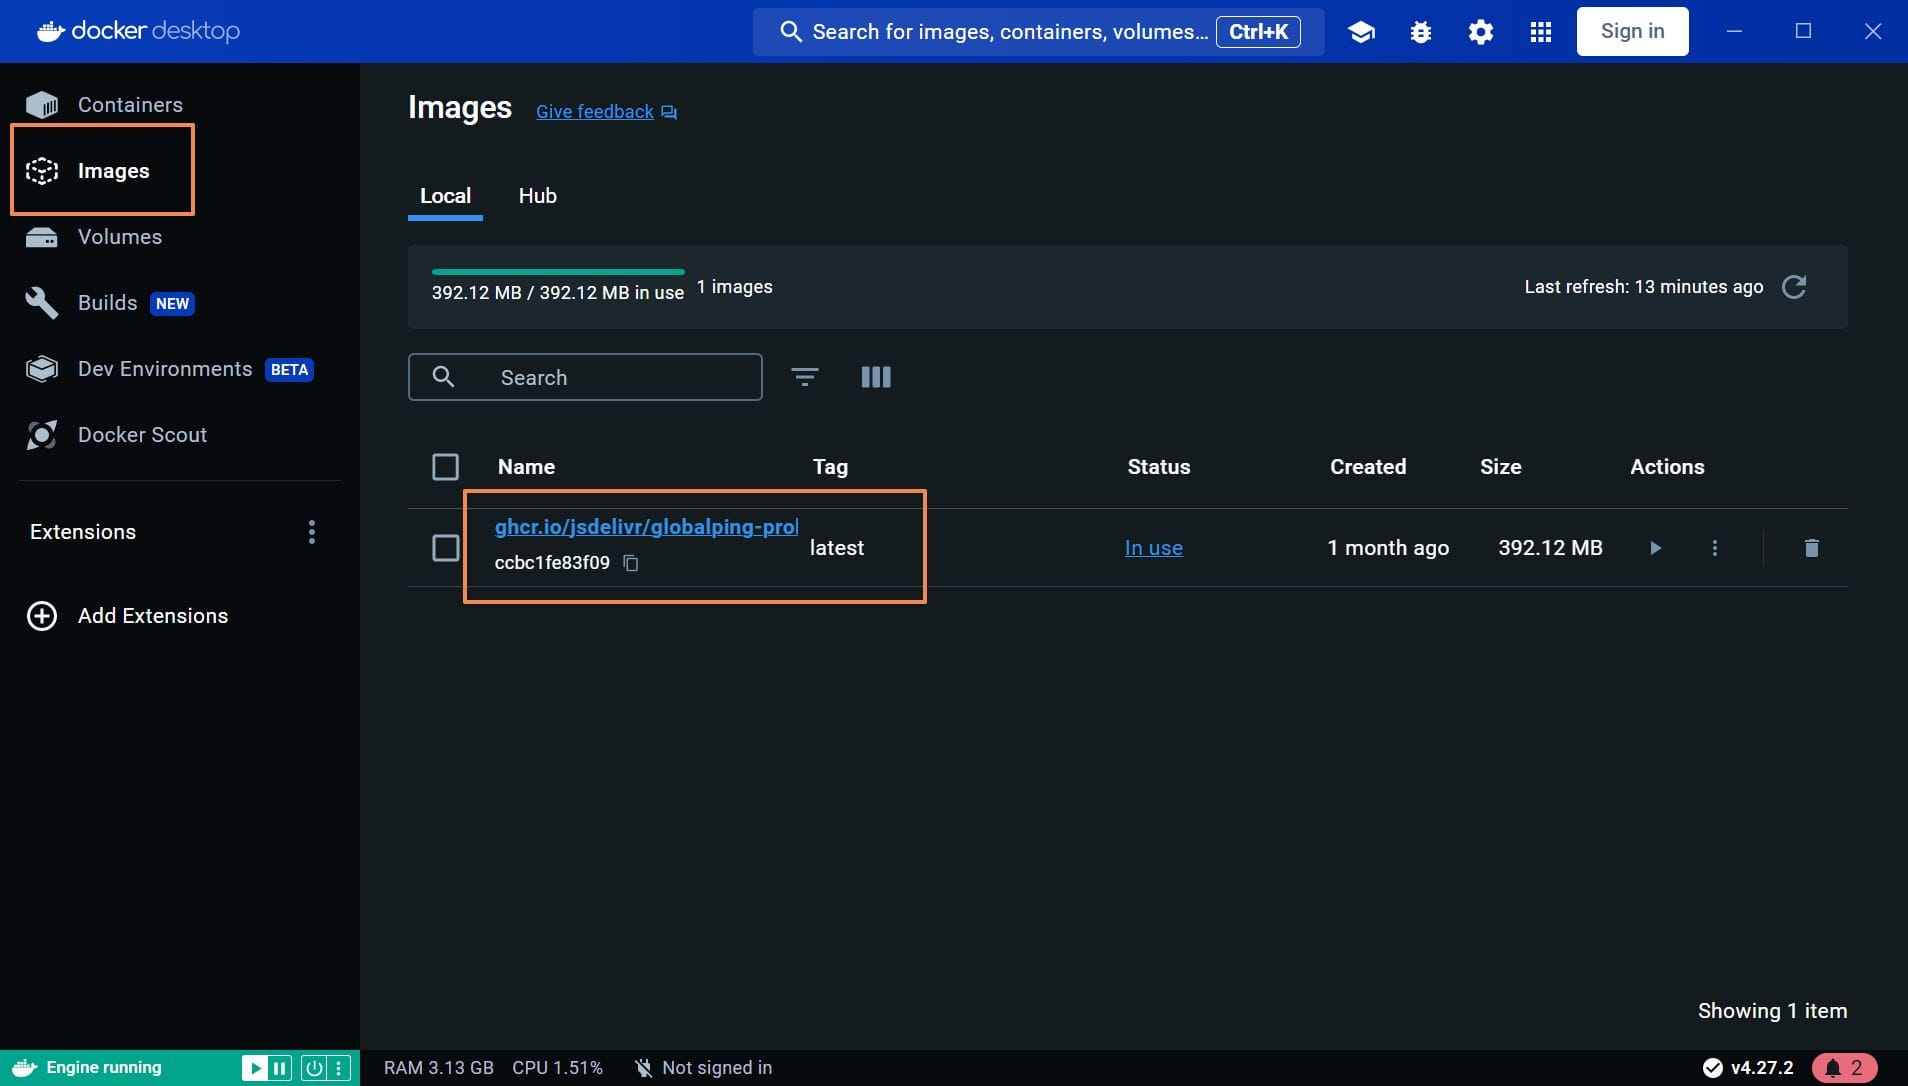
Once the download is complete, you can return to Docker Desktop and see that you now have an entry in the "Images" tab.
Run your probe
To start the probe, you first need to create a container:
- Look for the start/play icon (the rotated triangle) next to the image and click on it.
- If you want to assign a specific name to the container, click "Optional settings" and enter the name. Otherwise, Docker will create a random one for you.
- Leave all the other settings as they are and click the "Run" button.
Congratulations! Your Windows machine is now running a Globalping probe and is available in the Globalping probe network to run measurements.
4) Examine your probe
After you run the container, Docker Desktop switches to a new view where you can access the "Logs."
In this section, you can monitor what's happening with your probe. You can also view the location data assigned to your probe by the API, including your network and ASN.
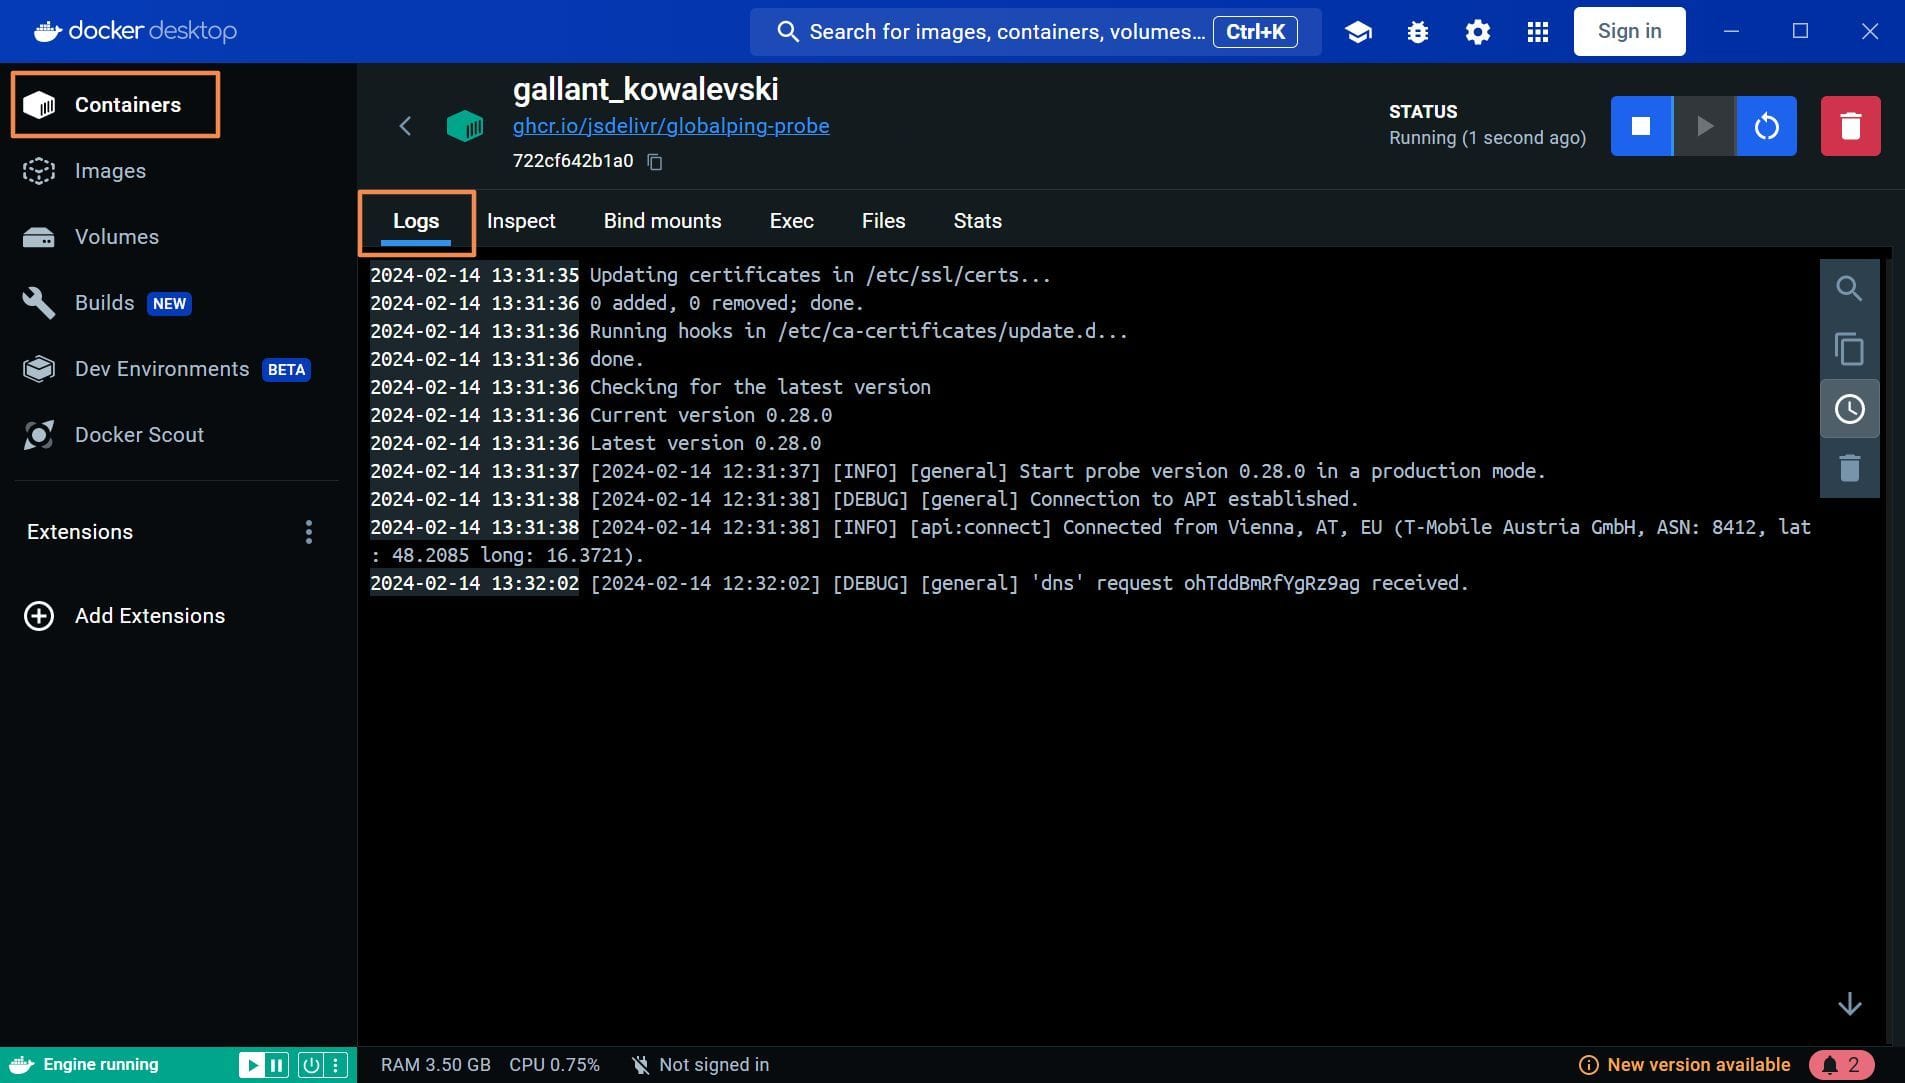
Note: The API doesn't provide your probe's exact location. You can confirm this by using the latitude and longitude values visible in the Logs view and entering them into a Maps app. In the example shown in the screenshot, I ran the probe from Vienna, Austria. The coordinates point to the city center, which differs from my probe's location.
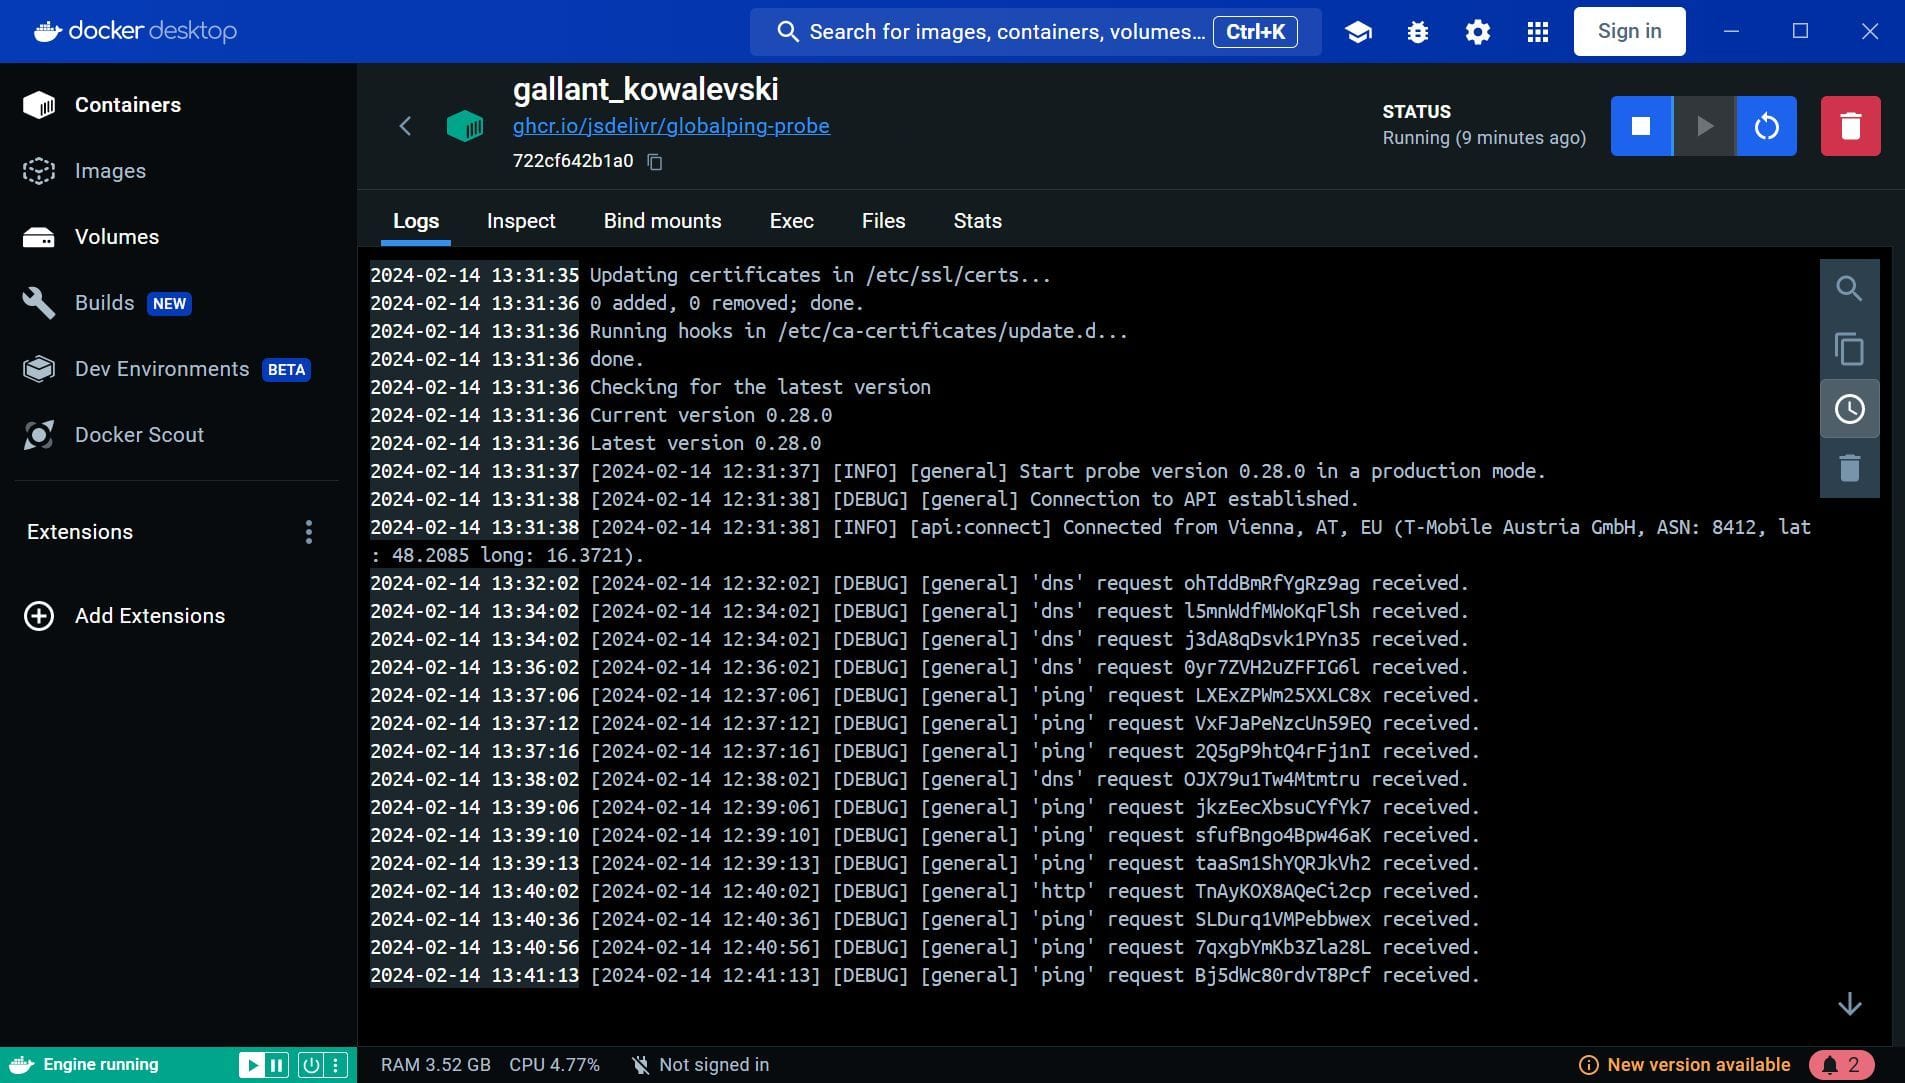
If you keep an eye on the Logs, you will see a new log entry each time your probe runs a measurement request, including the test type and measurement identifier.
5) Auto-run Docker Desktop and your probe
Note that the probe won't run automatically when you restart your computer. Additionally, if the probe is already running, it updates itself to the latest version every seven days, which requires stopping the container. In both cases, you will need to start the container manually.
At present, it is not possible to configure Docker Desktop to automatically start containers upon start-up or when they stop unexpectedly.
However, you can use Docker commands outside of Docker Desktop to initiate the container. If you're comfortable with it, we recommend running the container from your terminal, as it allows you to include additional parameters to configure it to run automatically. We have a guide on dev.to that provides you with a copy-paste-ready command to auto-start the probe along with some explanations.
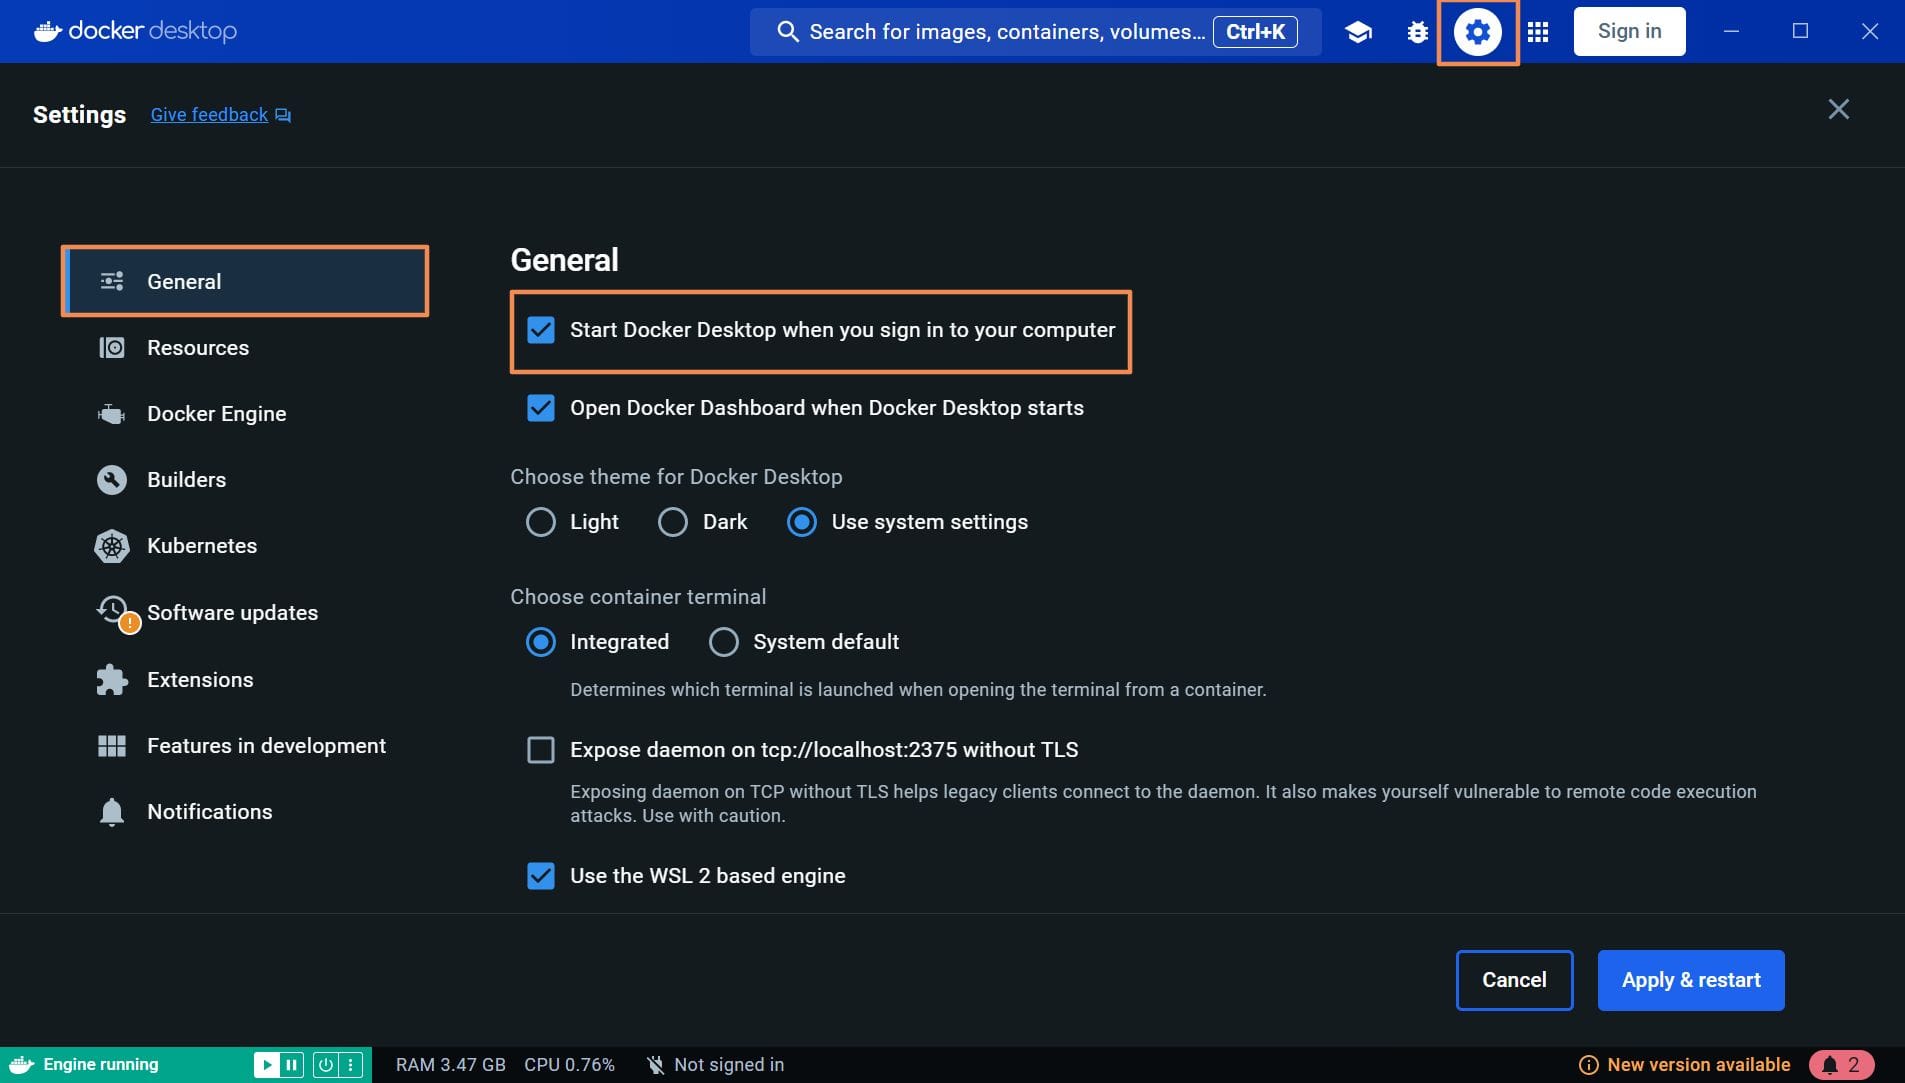
This is how you can ensure Docker Desktop (the app itself) starts automatically when you log into Windows:
- Click on the Settings button at the top (the gear icon).
- Go to the "General" tab and enable the "Start Docker Desktop when you sign in to your computer" option.
- Save the changes and restart Docker Desktop for the changes to take effect.
6) Stop and restart your Globalping probe
- To stop the container from running, click the Stop button in the "Containers" overview or the probe container detail view.
- Click the three dots next to the Stop button in the "Containers" overview. You can see several other commands, including Pause and Restart.
7) Update your probe
When you start the probe, it automatically checks for updates. If a newer version of the image is available, it will update itself. This ensures that the probe is always running on the latest version.
However, this only updates the image and not the container itself. While this is not a major issue, we still recommend that you manually update the container from time to time. To do this, follow these steps:
- Stop the container if it is currently running.
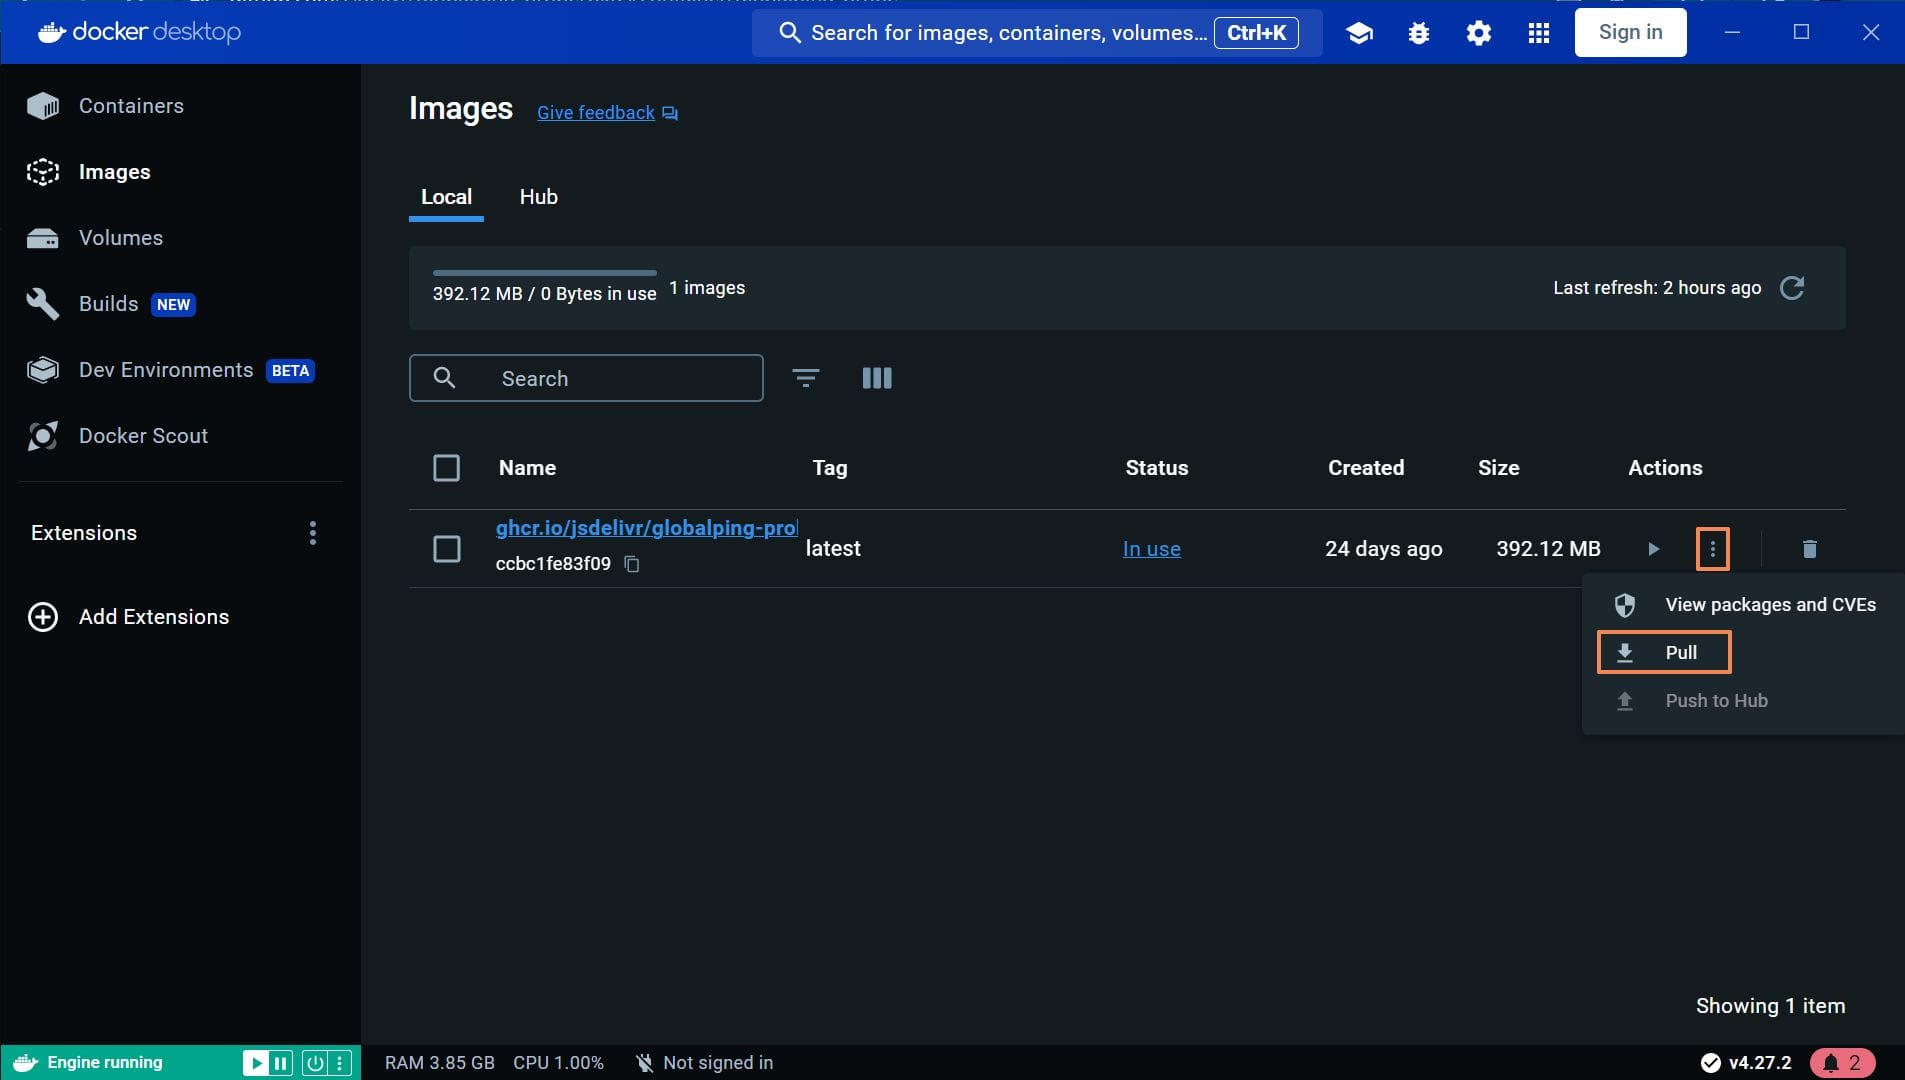
- Go to the “Images” tab, click the 3-dots icon next to the image name, and select “Pull”.
- If there’s a newer version, wait for the download to finish.
- Click the start button next to the new image to create a new container.
- Once the new container is up and running, delete the old container from the "Containers" view to tidy up the space.
Conclusion
Welcome to the Globalping community!
We hope our instructions have made it straightforward for you to run a Globalping probe on your Windows machine. If you can't keep it running 24/7, please don't worry. Any contribution to the network is highly appreciated!
If you're interested in running a probe continuously on a device that's always online, such as a server, you can refer to our GitHub Readme. You can learn which commands to use there and get our universal installation script for Linux servers if needed.